Friday, September 25, 2009

Quick Rise Method


I just had to share this idea, it has never failed for me yet and you really can't tell the difference in the bread either.

When rising in the bowl place on the stove top, open the oven door a crack and put it on 190-200 F. It only takes an hour!

When rising in the pan place in the oven on 200 F for 15-20 minutes, or until it has reached desired size.

Farmstead Sourdough Bread

At least 4 days in advance prepare sourdough starter! (See previous post)

The first time I made this bread I only let the starter sit for two days, It is definately better after four. I really liked this bread, it does get a little bit dry after a day or two, but still good enough for a peanut butter and jelly sandwich. It isn't hard to make and I must admit I love the smell of sourdough. I think it would make awesome french toast! I'll give it 4 1/2 stars.

This makes 2 9x5 inch loaves

1 1/2 cups warm water (105-115 F)
1 Tablespoon (1 package) active dry yeast
1 Tablespoon sugar
1 cup sourdough starter
8 Tablespoons (1 stick) unsalted butter, melted
1 Tablespoon salt
51/2 to 6 cups unbleached all purpose and/or bread flour
1/4 cup fine yellow or white cornmeal, for sprinkling (I didn't actually use this)

1. Sprinkle yeast and a pinch of sugar over 1/2 cup warm water in a small bowl. Stir
until dissolved and let sit until foamy, about 10 minutes.


2. In a large bowl mix together sourdough starter, remaining water, sugar, melted butter, salt and 3 cups of flour. Mix (by hand or with mixer) until smooth. Add yeast.


Add the remaining flour 1/2 a cup at a time until you have a soft dough that forms a ball. If you are using a mixer switch to a wooden spoon when it gets to stiff to use.

3. Place dough on a lightly floured surface and knead for 10-15 minutes.


(the book says 1-2 for machine mixed, 3-4 for hand mixed) The thing is, the longer you knead the stronger the gluten is. So the shape is much better and the texture as well.

4. Place in a greased container, turn to coat. Cover with plastic wrap and let rise at room temperature for 1 to 1 1/2 hours, or until doubled. Gently deflate, divide into two pieces and shape. Place in greased pans until doubled in bulk, about 1 hour.


5. Twenty minutes before baking preheat oven to 350 F. Bake 35-40 minutes (10 minutes longer in clay pans). Or until desired color. Loaves are done when you tap on them and hear a hollow sound. Immediately remove from pans (otherwise moisture gets trapped and they are all soggy). Place on wire racks, completely cool before slicing.


Sourdough Starter

At least 4 days in advance make the sourdough starter:

2 cups lukewarm water (90-100 F)
1 tsp. active dry yeast, or 1/2 tsp instant yeast, or 1/3 of a .06 oz. cake of fresh yeast
1 tablespoon sugar or honey
1/4 cup nonfat dry milk, (Can substitute dry goat milk, or buttermilk powder)
1/3 cup plain yogurt
2 cups bread flour

1. Pour warm water into bowl, sprinkle yeast and sugar over the top and stir to dissolve. Add the yogurt and flour and stir well.

2. Put in a glass jar (I recommend wide mouth) ceramic pot, or plastic container. Cover loosely with plastic wrap or double thickness of cheesecloth. Let sit at room temperature for at least 48 hours or up to 4 days (Depends on how strong you like it). It will get a clear liquid on top, stir it back in twice a day. It will be bubbly and will start to ferment, if it gets a pinkish color or overpowering smell toss it!


3. On the 4th day, add 1/4 cup water and 1/3 cup flour, let it stand overnight. Then store it in the fridge, loosely covered. Bring to room temperature before using.

4. After removing amount needed feed it with 1 cup of flour and 1/2 cup milk. Let it sit at room temperature for a day to begin fermenting again, then refrigerate. If you want to keep it going feed every two weeks with 1/4 cup water and 1/3 cup flour.

Monday, September 21, 2009

Banana Bread

At the bottom of this post are some extra ingredients that I like to add along with an excellent low fat idea that is delicious!

I have to admit, I haven't always been the biggest banana bread fan, I like pumpkin a lot more. But after learning from this recipe about wrapping the bread up tight and refrigerating it overnight, plus adding extra ingredients, it has definately made a difference. This recipe gets 5 stars for sure!

After a losing battle with my camera's USB Port I resorted to using pictures other then my own!


1/2 cup oil
2 large eggs
1 cup sugar
1 tsp. vanilla
3 medium to large overripe bananas (12-14 oz) slightly mashed
1 1/4 cups unbleached all purpose flour
1 tsp. baking soda


Directions
1. Preheat oven to 350 F. Grease one or two 9x5 inch loaf pans (depending on the size of loaf you want), you can flour if you like, I didn't and they came out fine.

2. In a bowl combine oil, sugar, eggs and beat hard with a whisk or hand mixer until creamy and light colored. Add the vanilla and mashed banana.

3. In another bowl combine flour and baking soda, then add to the banana mixture.

4. Spoon/pour into pan(s) and bake for about 40 minutes for smaller loaves, 50 for large loaf. Loaf will be firm to the touch and slightly pull away from the edges. You can also use a toothpick/cake tester/etc.

Tip about Temperature:
If I am making a large loaf I bake it on 325 F, it doesn't burn on the outside this way while still doughy in the middle! You might have to cook it a little longer, check at 50 minutes then add five minutes at a time until done.

5. Place loaves on cooling rack and cool completely. Then wrap tightly in plastic wrap and refrigerate for at least 3 hours, or overnight.


Extra's
Low Fat Version

1/4 C. Oil instead of 1/2
3/4 cup ground flaxseed
I have personally done this and it works great!
~~~~~~~~~~~~~~~~~~~~~~~~~~~~~~~~~~~~~~~~~~~~~~~~~~~~~~~~~~~~~~~~~~~~~~~~~~~~~~~~~~~

These are extra ingredients that I like to add:
2 tsp. Cinnamon or Pumpkin Pie spice
1 tsp. Lemon or Lime juice


Coming Up:
Farmstead Sourdough Bread

Sunday, September 20, 2009

White Mountain Bread

I apologize for the lack of pictures. I'm slowly learning! The next post will be better.

I mentioned in the previous post that one of the biggest things for me with bread is how good it is after it's cooled off. And in the following couple of days how it holds up.
I have also been raised on wheat bread and prefer it so white bread has always tasted a little bland to me. This bread is actually very delicious, very flavorful AND it tasted great the next day. It definately gets 5 stars.

The following directions are to make it by hand, (with some help from the dough hook attachments that came with my hand mixer) you can always use an electric mixer if you have one.

3/4 cup warm water
1 tablespoon/1 package yeast (I used active dry)
pinch of sugar for the yeast
1 1/2 cups milk (105-115 F)
3 tablespoons unsalted butter, melted, or vegetable oil
3 Tablespoons honey
1 Tablespoon salt
6 to 6 1/4 cups unbleached all purpose or bread flour ( I use a mixture of the two)

1. In a small bowl sprinkle yeast and sugar over 1/4 a cup of the water. Let sit until foamy, about ten minutes.

2. In a large bowl combine the remaining water, milk, butter, honey, salt and one cup of the flour. Beat until creamy, about 3 minutes by hand or one minute with mixer. Add the yeast, then add the remaining flour about 1/2 a cup at a time. You can use the hand mixer until it gets to stiff, then use a wooden/plastic spoon. You may use more or less then what flour it calls for. The dough should be slightly stiff.

3. Knead for a minimum of 10 minutes, if the dough gets sticky add a tablespoon of flour at a time as needed.

4. Place dough in a greased container. Cover with plastic wrap and raise for 1 1/2 to 2 hours.

5. Divide dough into two pieces, shape into logs. Place in two 9x5 inch loaf pans. Bake at 375 F for 40-45 minutes. The Bread will be done when you tap it and hear a hollow sound. Immediately remove from pans, otherwise the bread gets soggy on the bottom. Place on wire racks for at least 15 minutes before slicing.


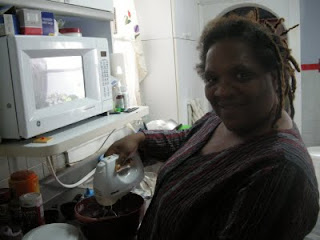
There's nothing like a good friend to bake with!

Monday, September 14, 2009

The Bread Bible


Last year for my birthday I got this terrific book called The Bread Bible beth hensperger's 300 Favorite Recipes. I have made about 25 of these recipes and have been very impressed with them. My great husband suggested that I start a marathon and make all of them, and blog my experience. My goal is to make 1 to 2 recipes a week.

I usually rate recipes from 1-5, 1=absolutely horrid and should not be a recipe, and 5=completely fabulous. I will be giving each recipe a rating.

I have linked the title to Barnes and Noble if anyone is interested in purchasing this book or finding out more about it!

As a general rule I have discovered that all bread is usually delicious while warm, the real test is how good it is when it has sat for several hours. Also remember that the majority of quick breads are 100 times better after being wrapped tightly and refrigerated overnight.

Coming up:
White Mountain Bread

Followers